
When starting a garden, it’s crucial to know what kind of soil you’re working with. It will help you determine what to plant and how to amend your soil. All soil is comprised of three basic components: sand, silt, and clay, and varying combinations of these three components determine what type of soil you have.
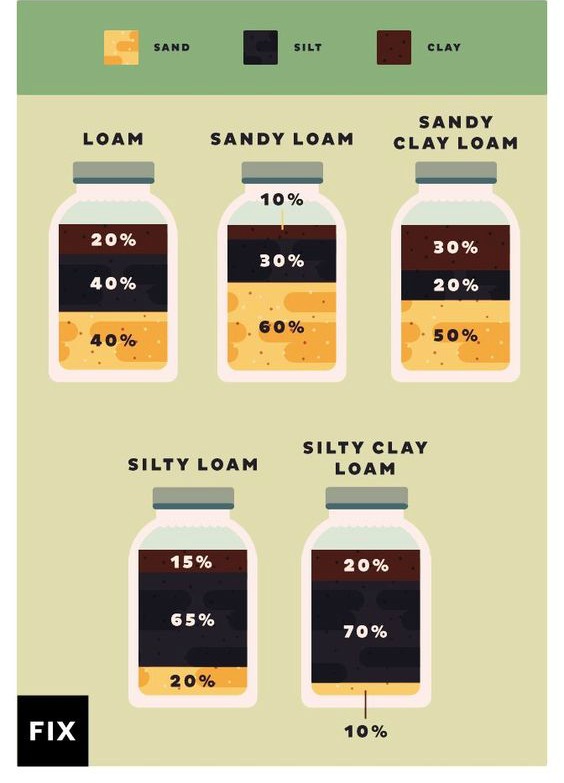
Loamy soil is ideal, and it is typically more or less an even mix of sand, silt, and clay. It is slightly spongy and moist, but still light enough that it doesn’t get packed down too easily. In essence, it’s just right. To achieve this ideal soil, you would want to add whatever component your soil is lacking.
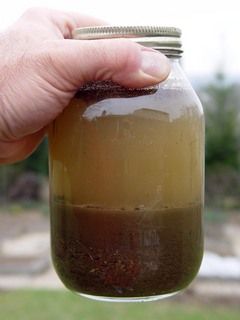
To test your soil, all you need is a mason jar, some water, and a little bit of time.
How to preform a mason jar soil test
- First, you need your soil sample. Don’t just grab a handful off the top though, dig a bit into some well-tilled soil, “stir” around a bit with your
 trowel, and get a good scoop from below the surface of your garden bed or the ground you are testing.
 - Once you have a nice sized scoop of dirt, fill your mason jar about halfway with the dirt.
- Fill the rest of the way up to the lip of the mason jar with water, leaving about 1″ of air.
- Attach the lid onto the jar securely, then shake vigorously. This will cause the dirt to settle once you’ve put the jar back down, as well as break up any sizable clumps of dirt.
- Set the jar back down and leave overnight. In the morning, you’ll have your results!
On the bottom will be sand, then silt, and then clay. Here’s a quick and easy guide to how to read your results and what they mean for your soil type:
If you enjoyed this, you might also like….
Home Defense in the End Times…
Natural Healing Secrets You Need to Know…
Eat Like Your Ancestors…